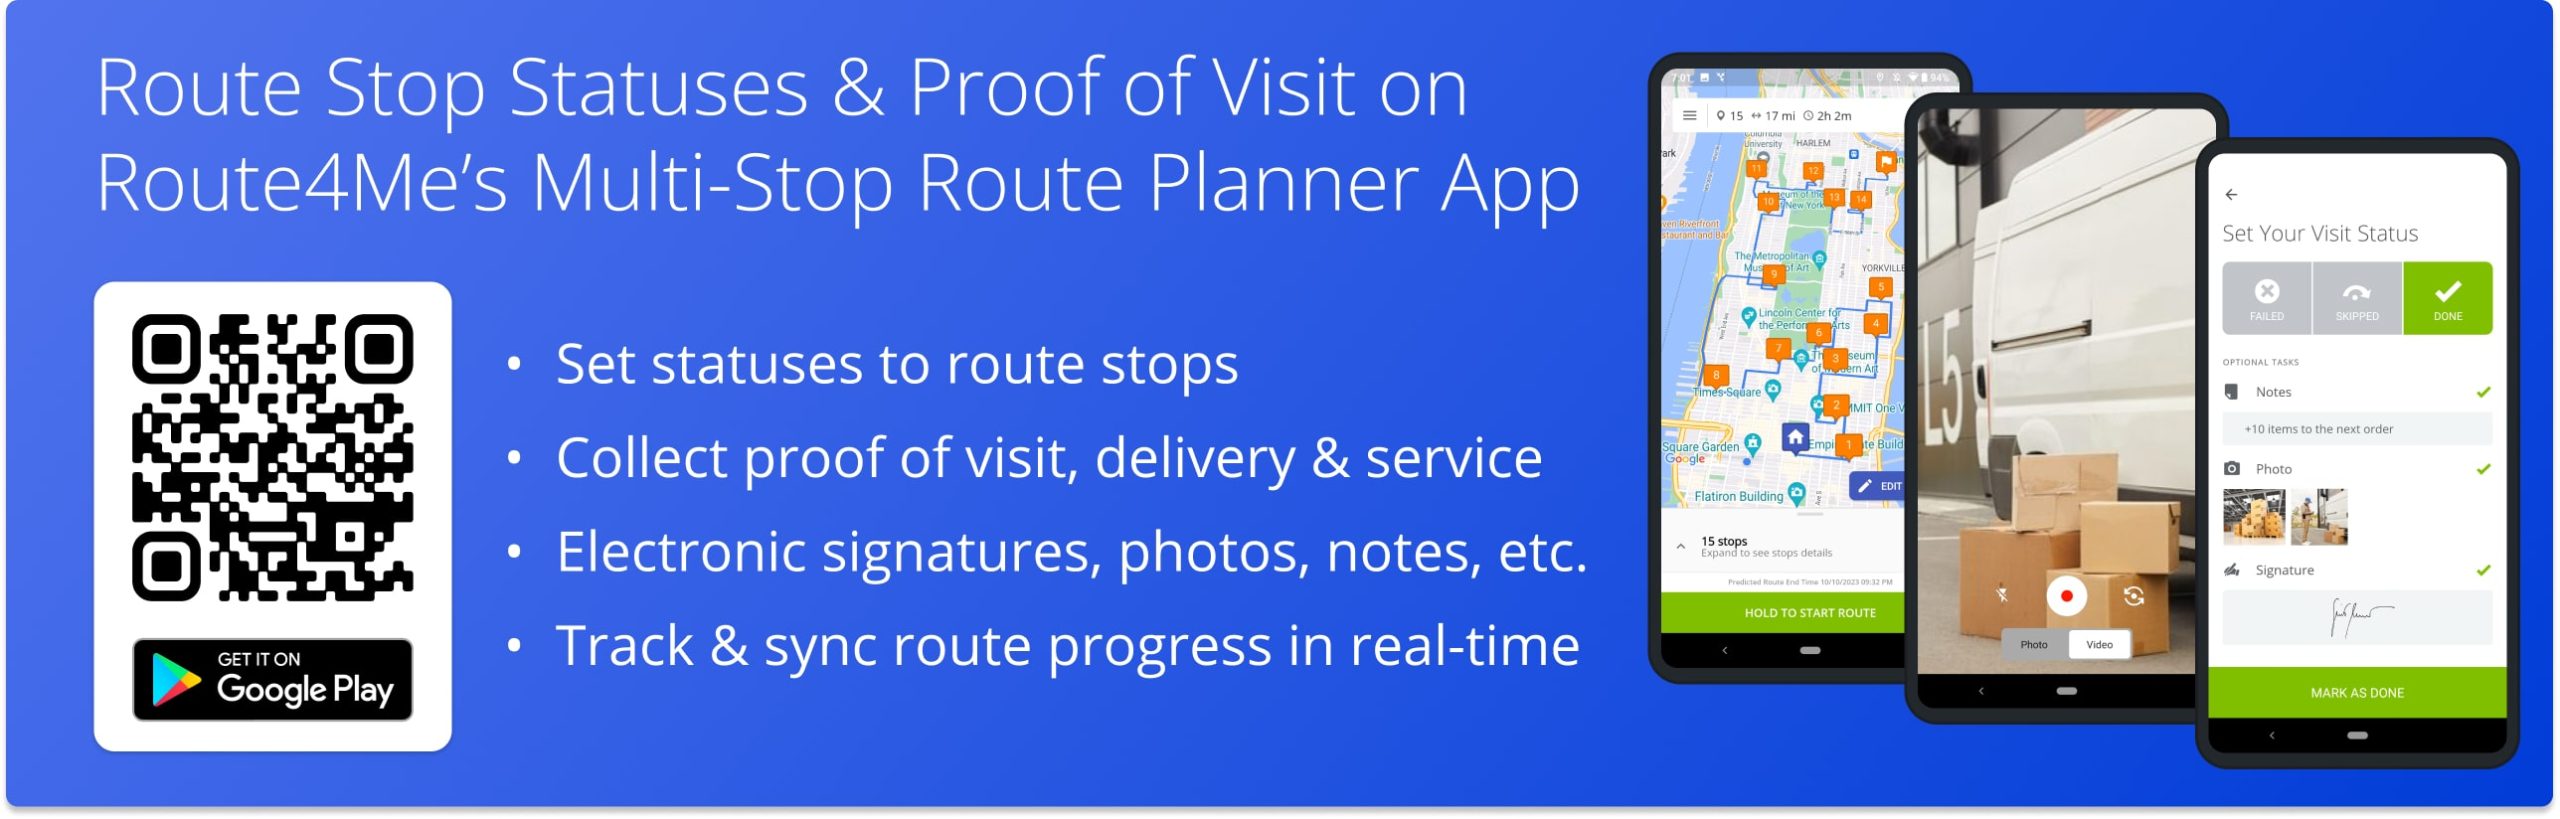
Stop Status And Proof Of Delivery – Android Route Planner App
Route4Me’s Android Multi-Stop Route Planner app provides seamless continuity throughout the entire process of planning and sequencing routes, as well as navigating and completing routes. Additionally, you can easily add statuses and attach proof of delivery (POD), visit (POV), or service (POS) to route stops for tracking route progress, completing orders, compliance, etc. In this guide, you can learn how to add stop statuses, capture and attach electronic signatures, images, photos, videos, and text notes.
NOTE: Depending on your account settings, you can have a different set of features available on your Route4Me Android Route Optimization App. To enable specific features for your account, please Contact Route4Me’s Support Team. Additionally, you can learn more about the difference between Route4Me’s Mobile and Marketplace Subscriptions and the features they support.
Table of Contents
Stop Statuses – Set Route Stop Statuses on Route Planner App
First, go to “Routes” in the app’s main menu and open the preferred route. Next, tap and hold the “Hold to Start Route” button to start the route. After that, you can navigate to route stops using Google Maps, Waze, Route4Me’s Integrated GPS Navigation, and other navigation apps. Additionally, you can learn more about Starting, Navigating, and Completing Routes Using Route4Me’s Android Route Planner App for last-mile drivers.
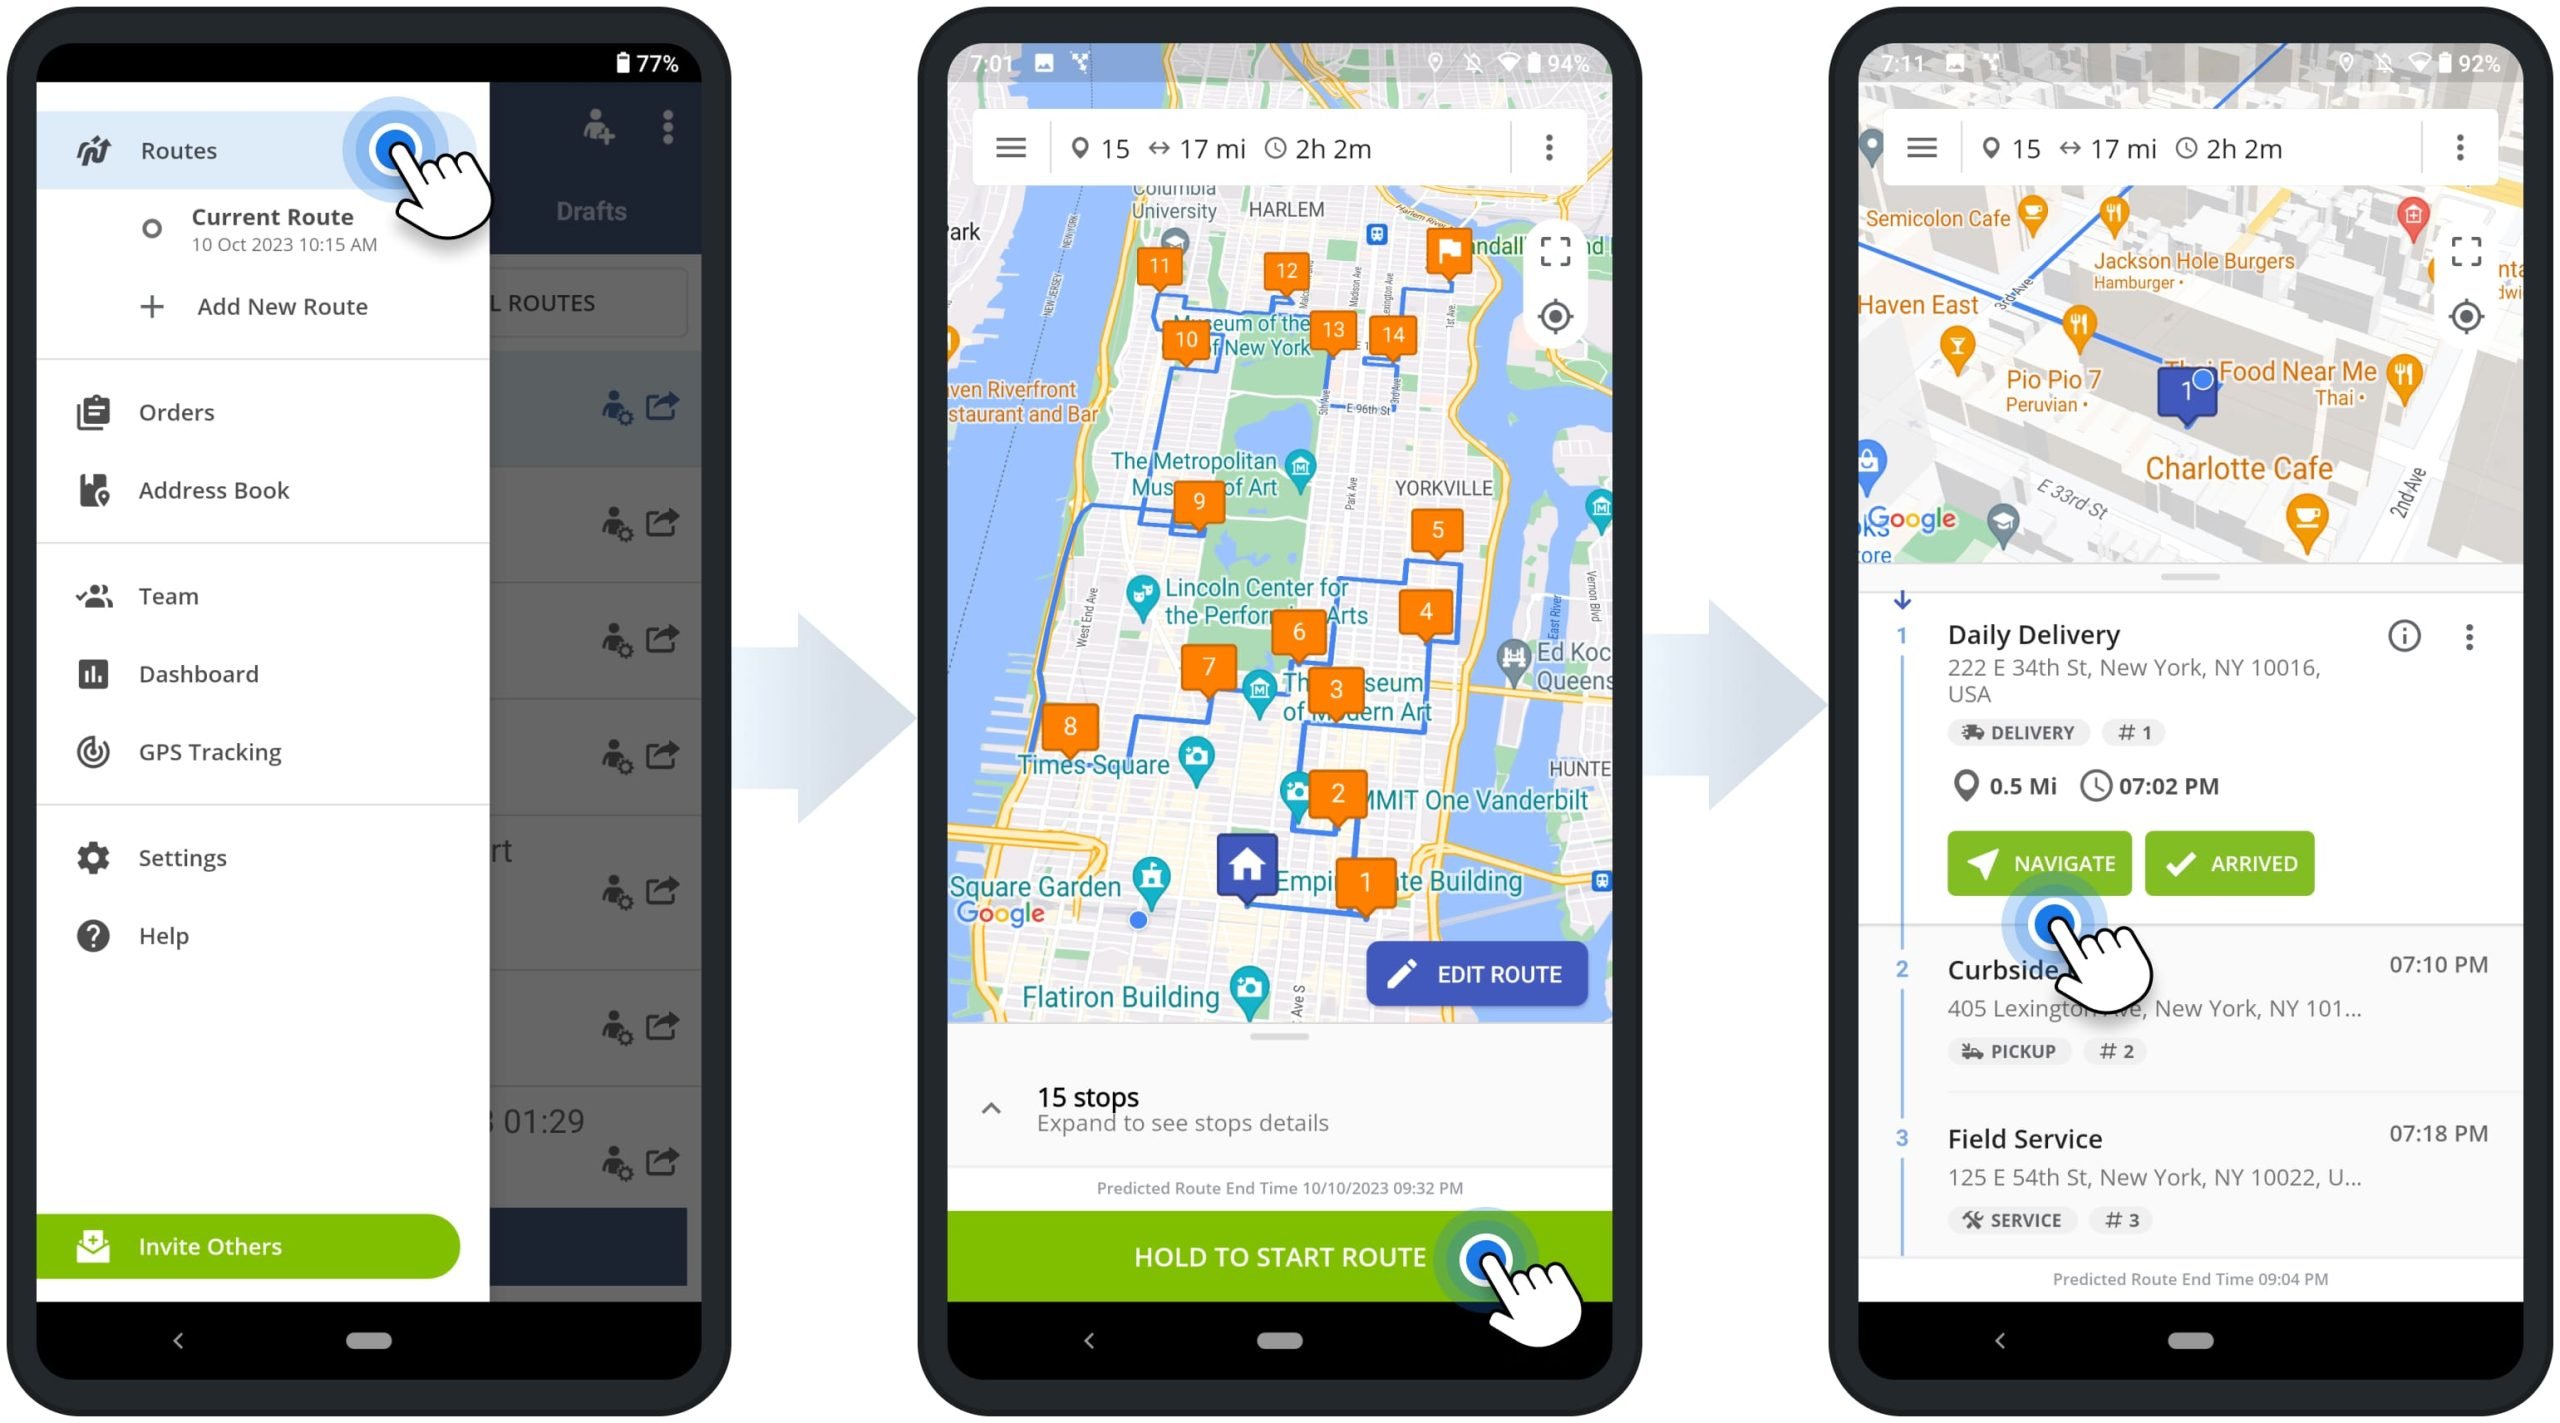
When you are using Route4Me’s In-App Voide-Guided Navigation and arrive at stops, the app automatically notifies you about the arrival and shows the stop’s details. Next, you can tap the “Arrived” and “Set Status” buttons and then set the preferred status to the given route stop.
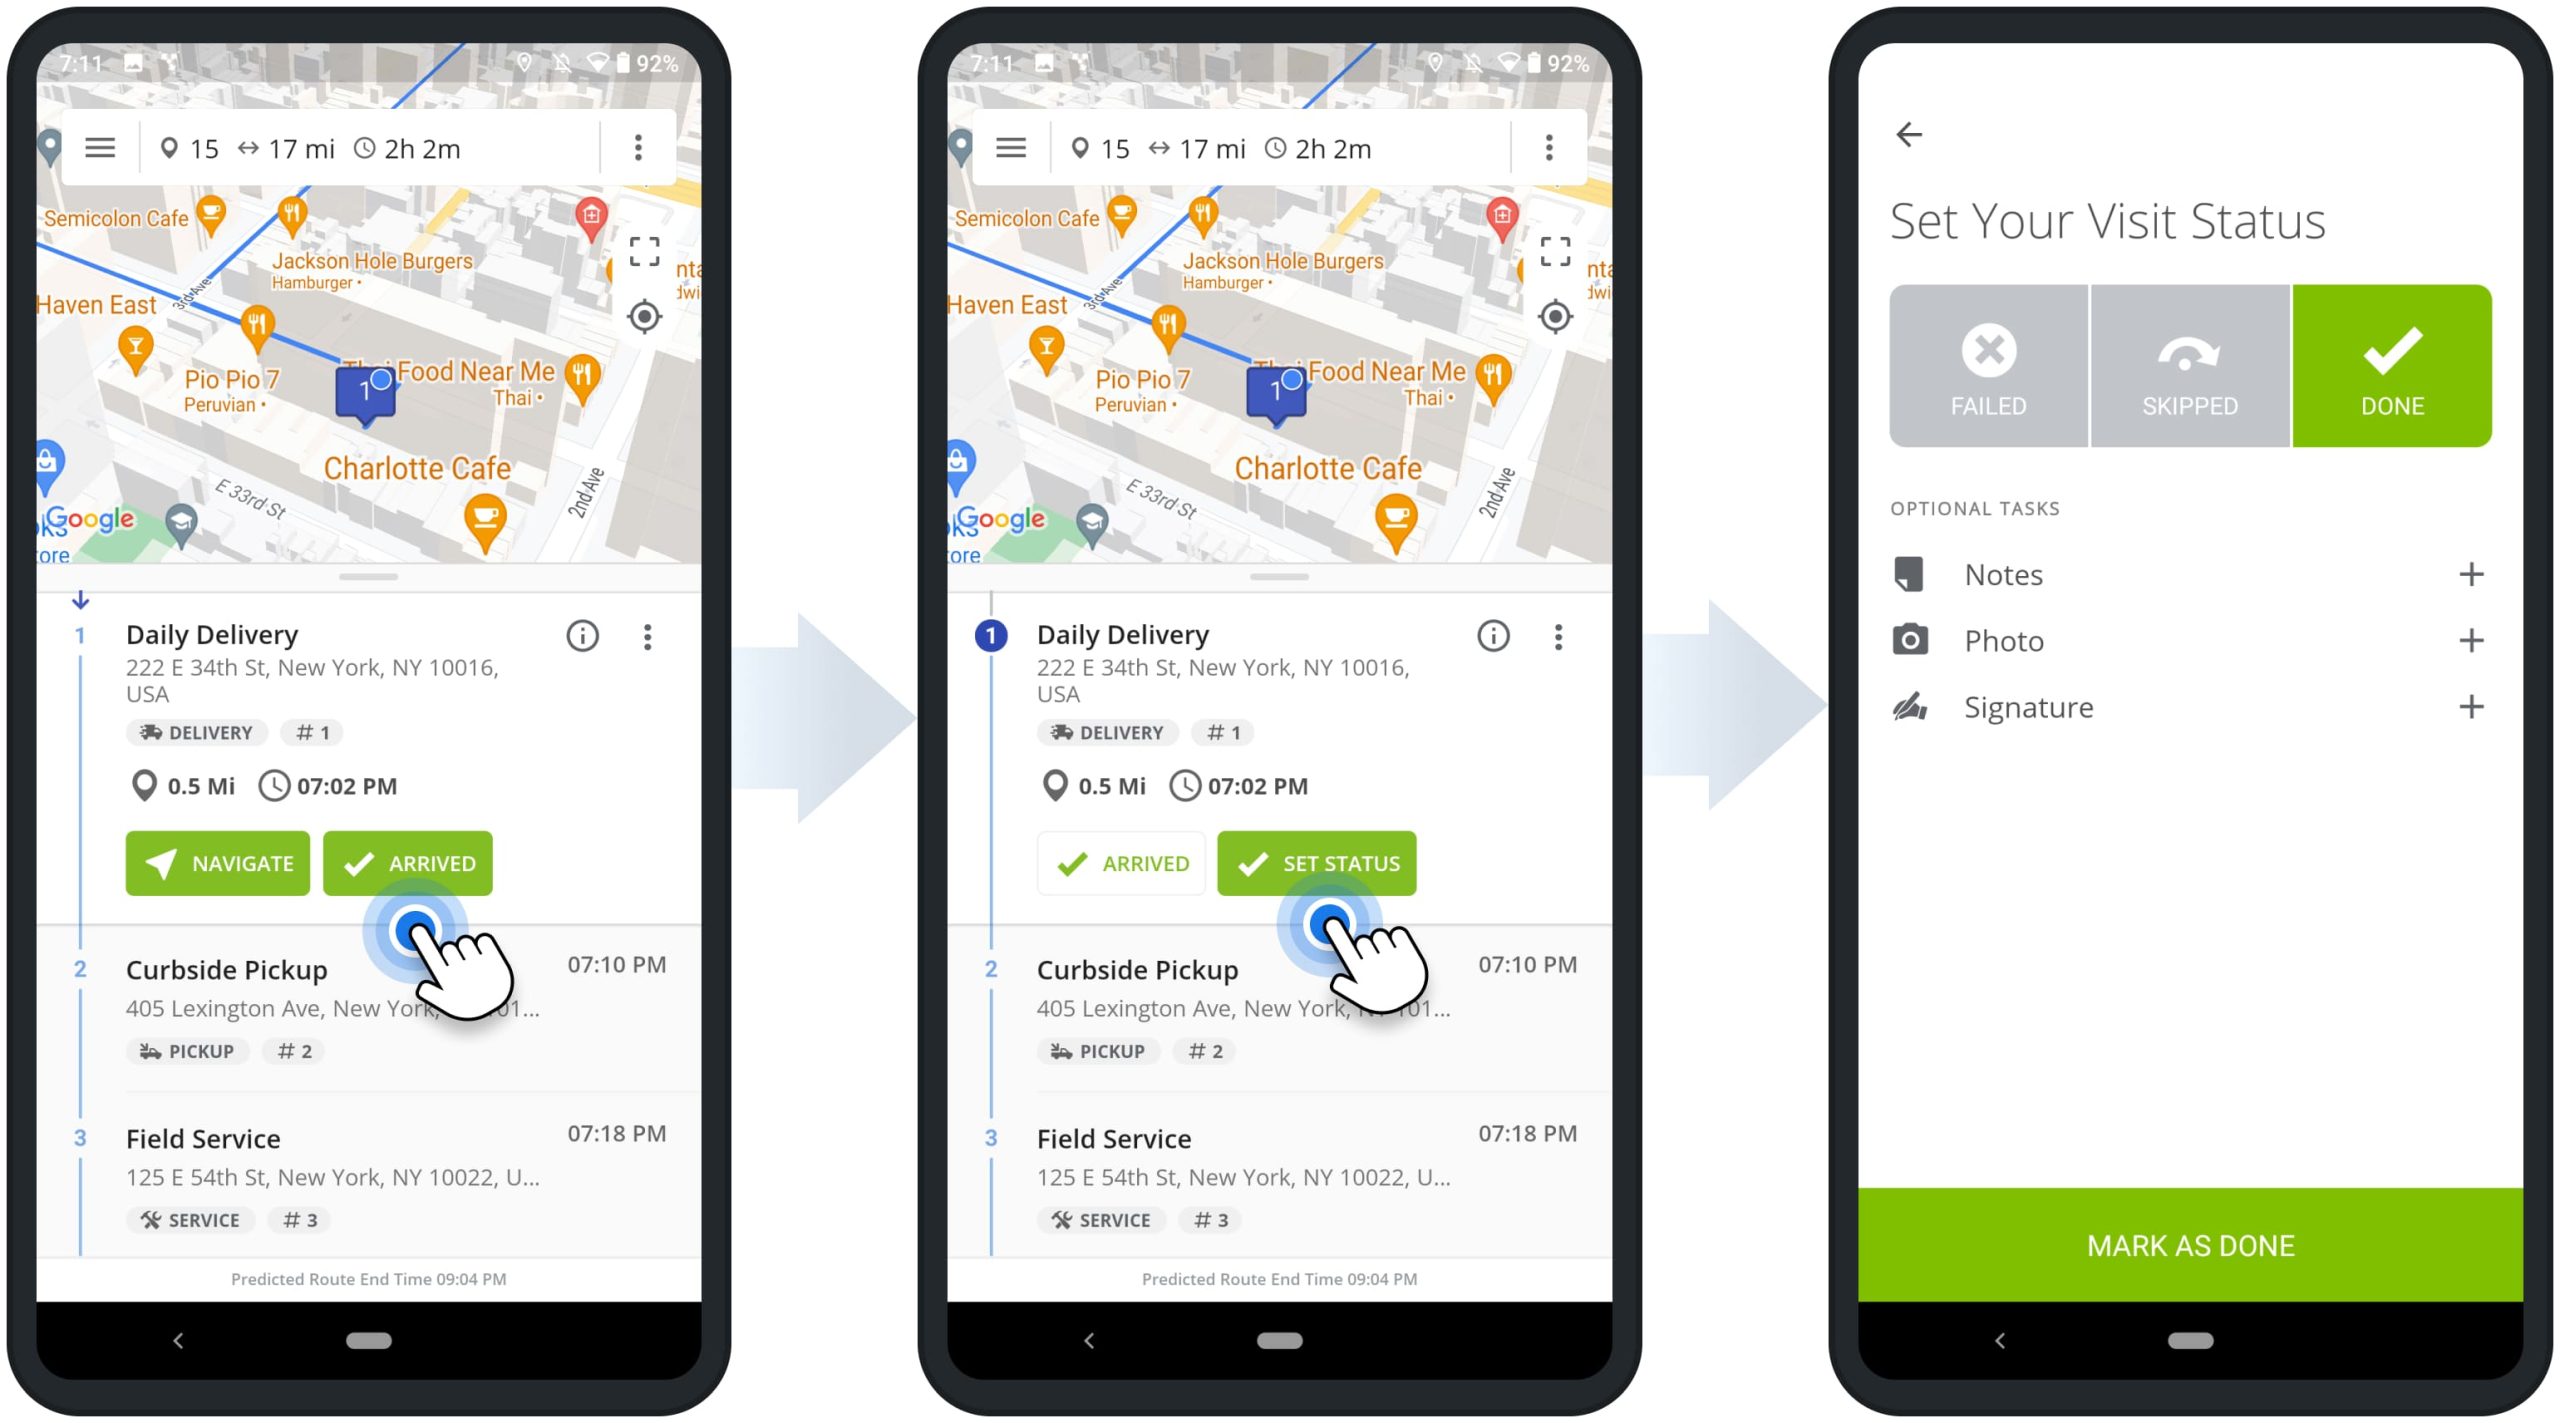
To do so, select the preferred status and then tap the respective “Mark As” button. For your convenience, stops statuses are generic and you can interpret them based on your specific business, routing, and operational requirements. Accordingly, the assigned stop statuses are displayed next to stops in the route’s stops list.
By default, you can assign the Done and Failed statuses to route stop. To enable the Skipped and other statuses for your account, please Contact Route4Me’s Customer Support Team.

Attach Proof of Delivery, Visit and Field Service to Route Stops
After selecting the preferred stop status, you can attach various types of proof of visit, delivery, or service to the stop. Specifically, you can attach text notes, images and photos, videos, and electronic signatures to your route stops. Furthermore, you can attach multiple POD types to one route stop.
Notes – Add Text Notes to Route Stops as Proof of Visit
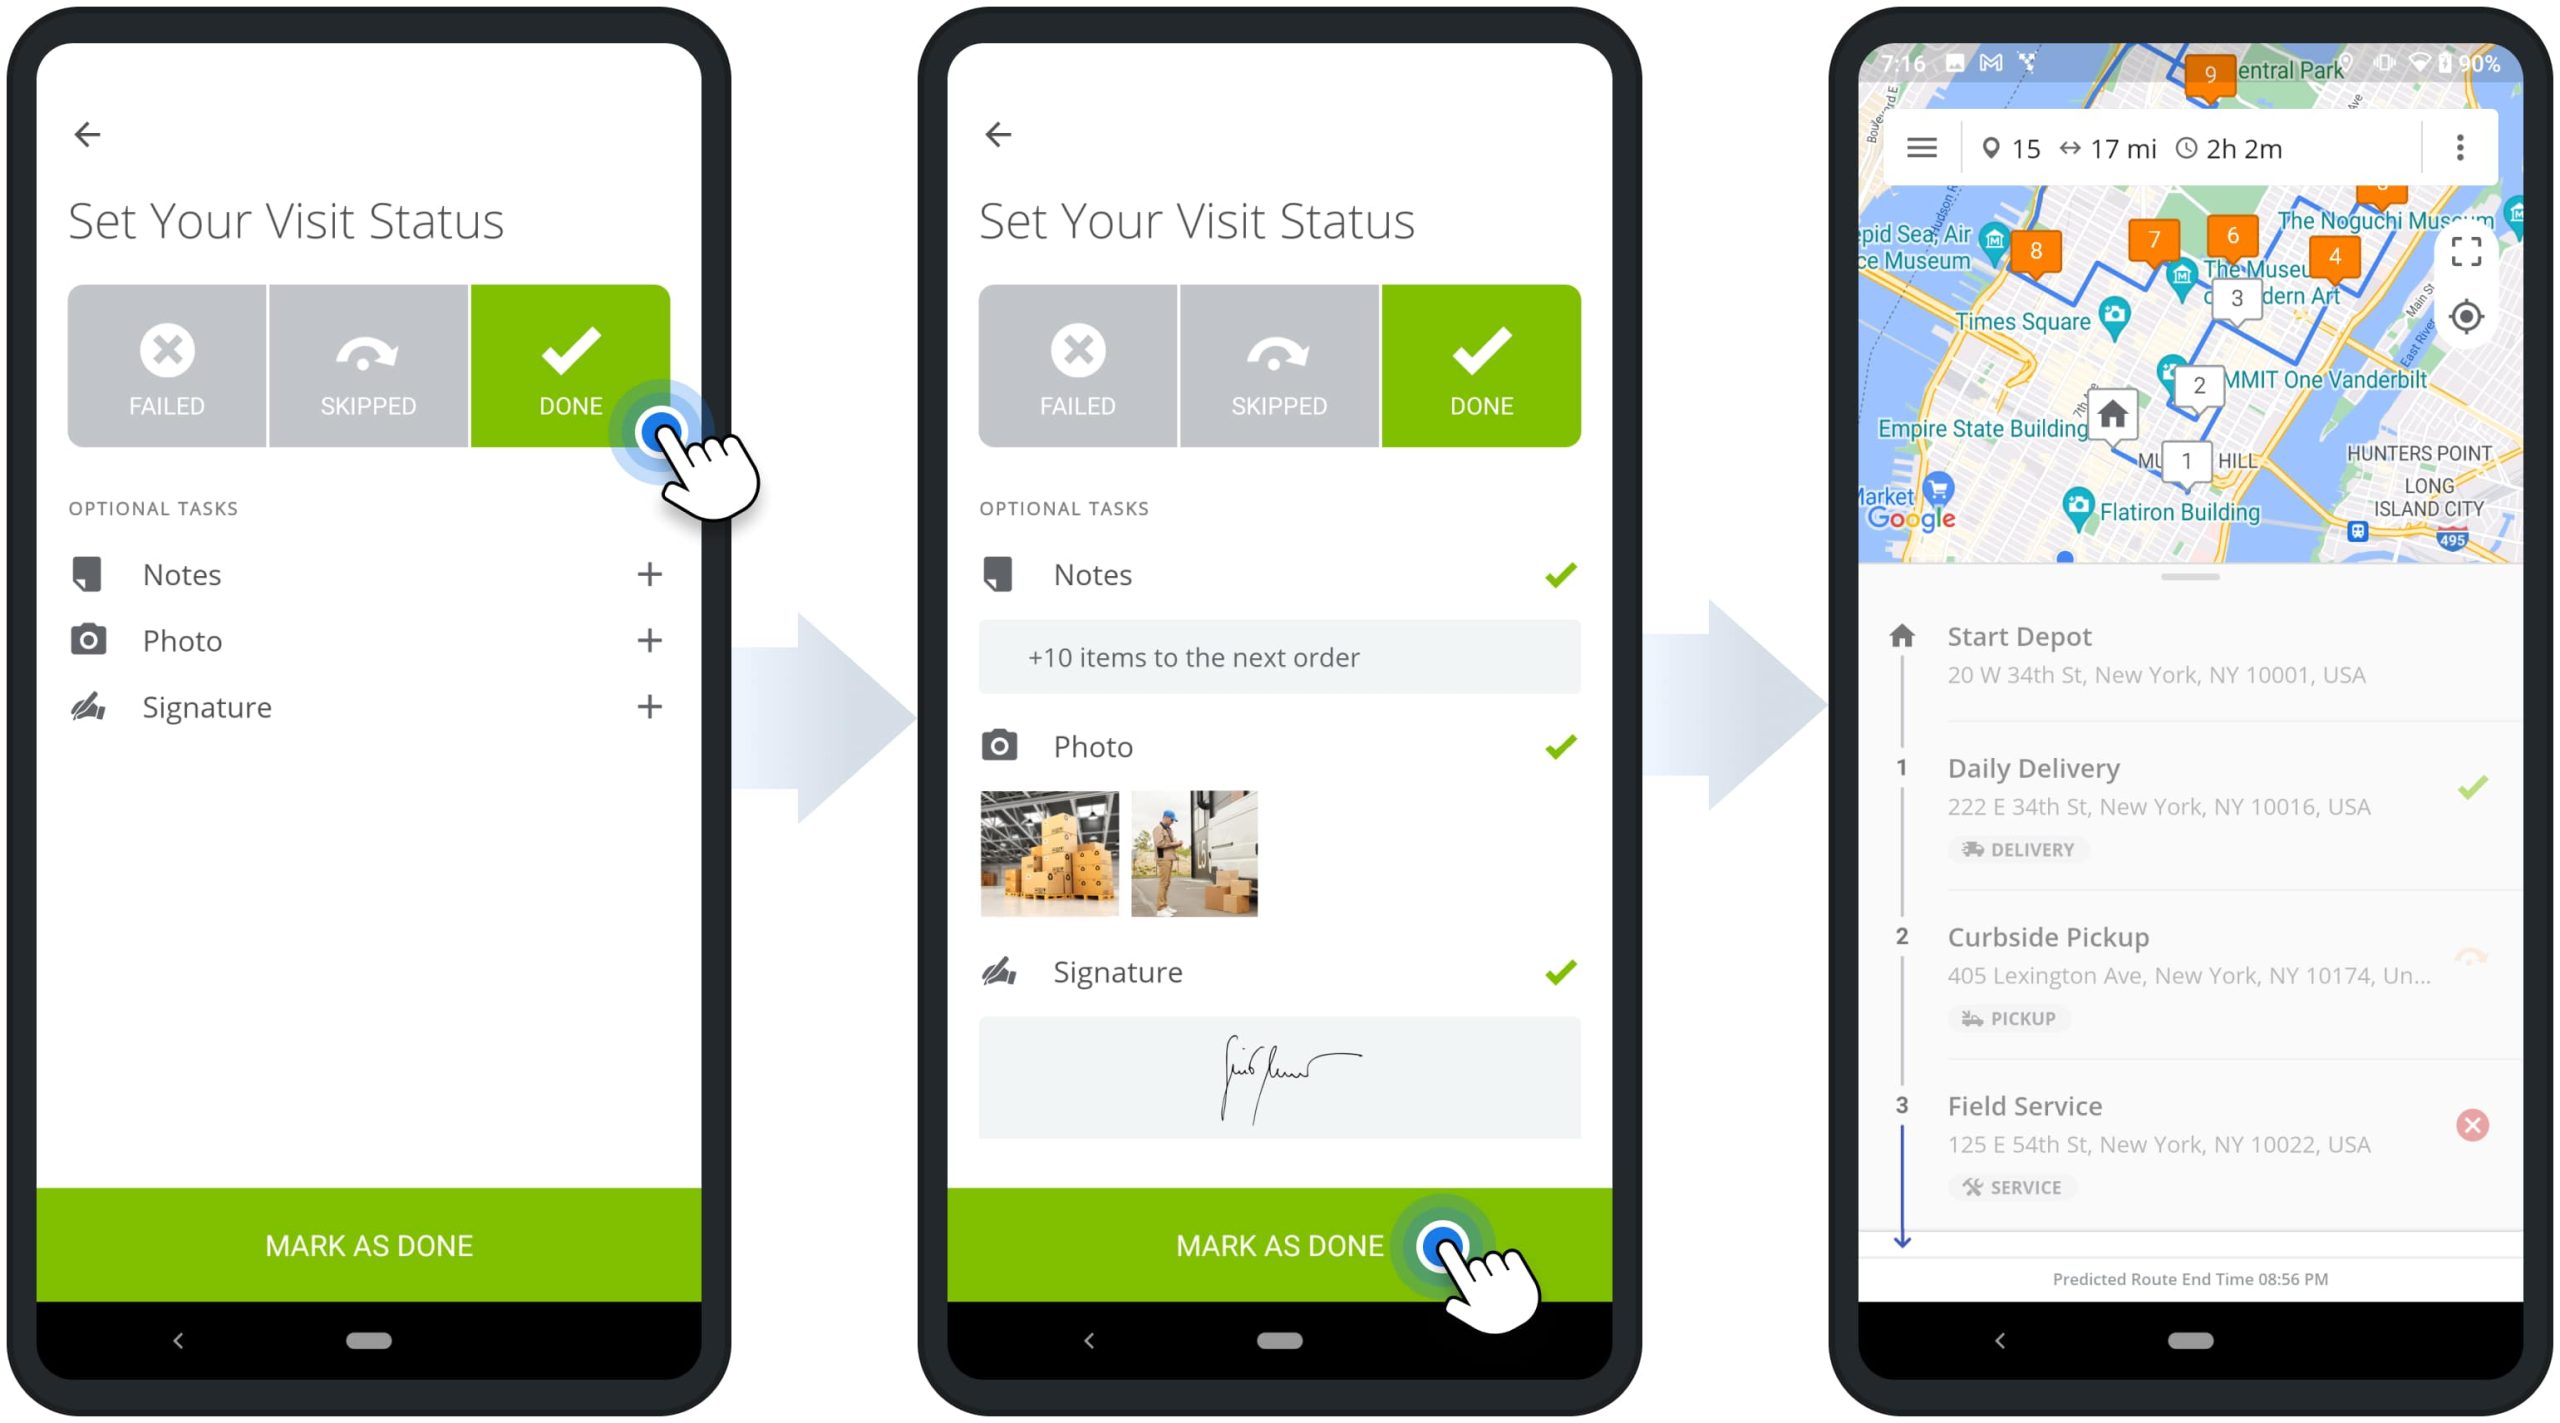
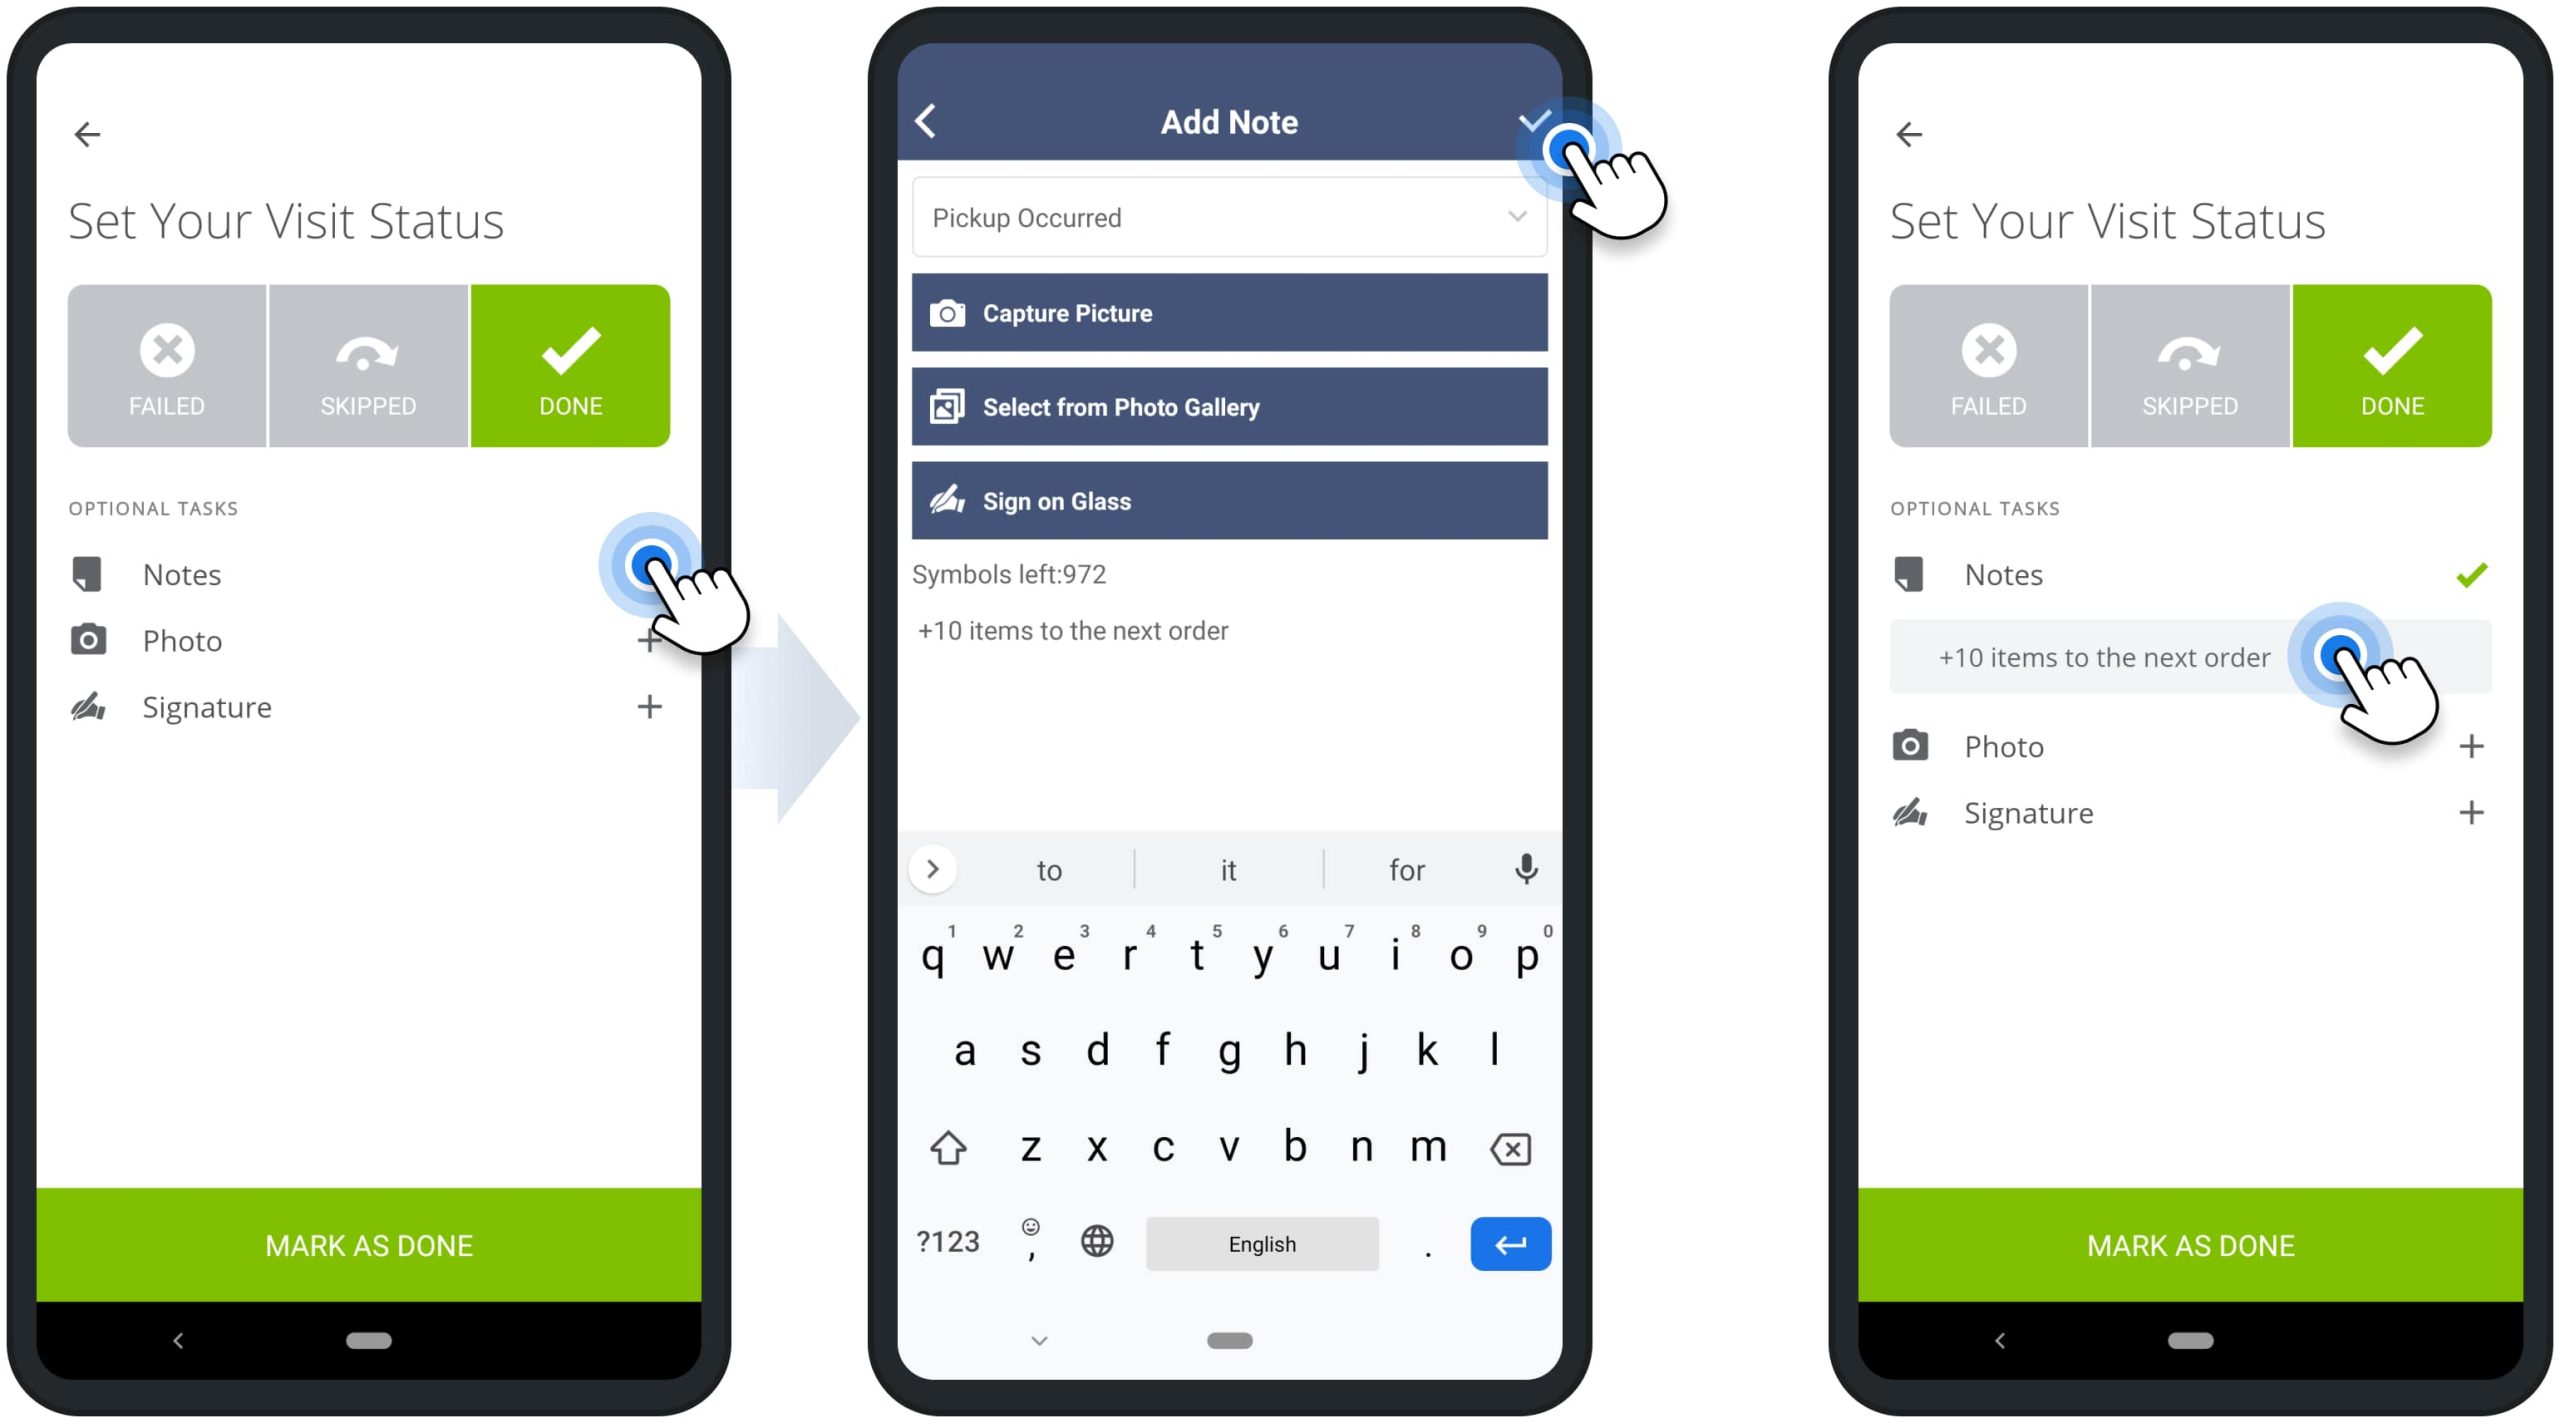
To add a text note, tap the plus icon next to the “Notes” action. Next, add the preferred text and then tap on the checkmark icon to add the note. Accordingly, you can use text notes to save additional order details, next order requirements, etc. Additionally, you can use notes to add images from your device and capture signatures.
Photos – Attach Images to Route Stops as Proof of Delivery
To attach a photo, tap the plus icon next to the “Photo” action and then select the “Photo” camera mode. Next, use your device’s camera to take a photo and then attach it. Furthermore, you can attach multiple photos to one stop. To add an additional photo, tap on the respective plus icon and then take and attach another photo. Accordingly, you can take photos of receipts, delivered parcels, completed services, etc., and attach them to route stops as proof of visit, delivery, or service.

Videos – Attach Video Recordings to Route Stops as Proof of Service
To attach a video recording, tap the plus icon next to the “Photo” action and then select the “Video” camera mode. Next, use your device’s camera to record a video and then attach it. Furthermore, you can attach multiple videos to one stop. Accordingly, you can record videos for instructions, quality control, order requirements, completed services, etc., and attach them to route stops as proof of visit, delivery, or service.

Signatures – Attach Customer E-Signatures to Route Stops as Proof of Visit
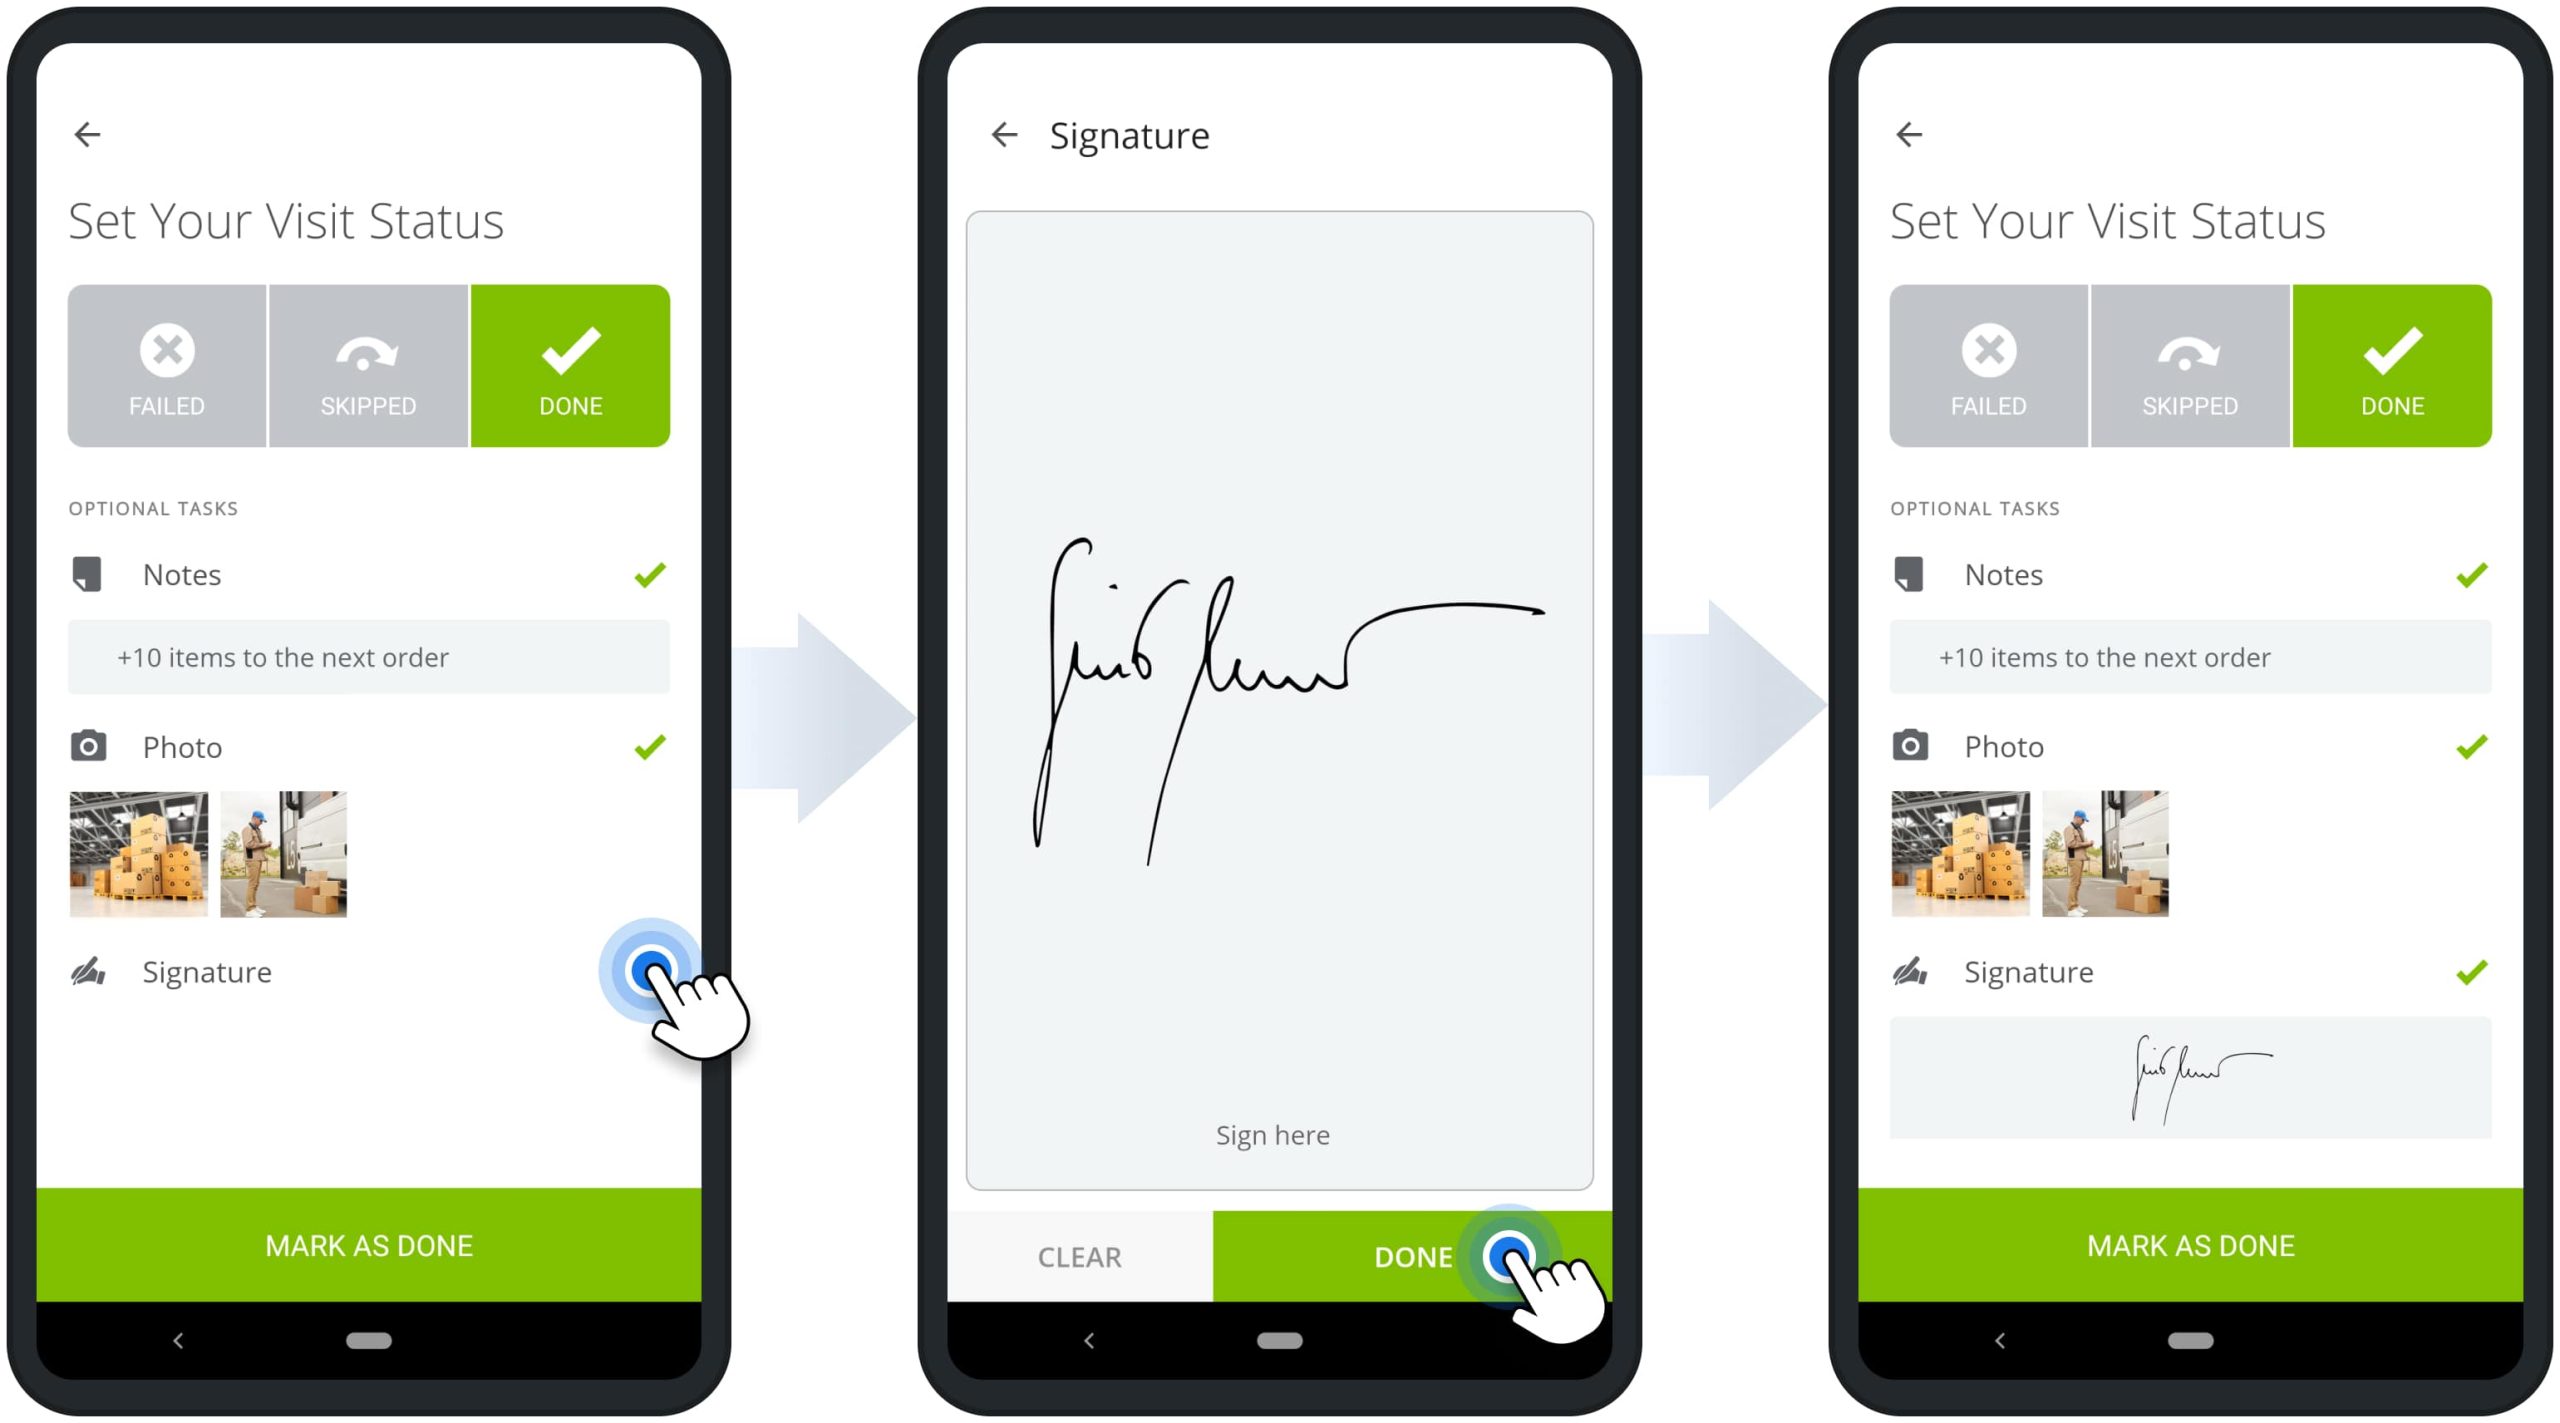
To attach an electronic signature, tap the plus icon next to the “Signature” action. Next, leave the signature on the screen and then tap the “Done” button to save it. Equally important, you can attach only one signature at a time. Accordingly, you can capture customer signatures and attach them to route stops as proof of visit, fulfilled delivery, or completed service visit.
Check Attached Signatures, Images, and Notes Proof of Delivery (POD)
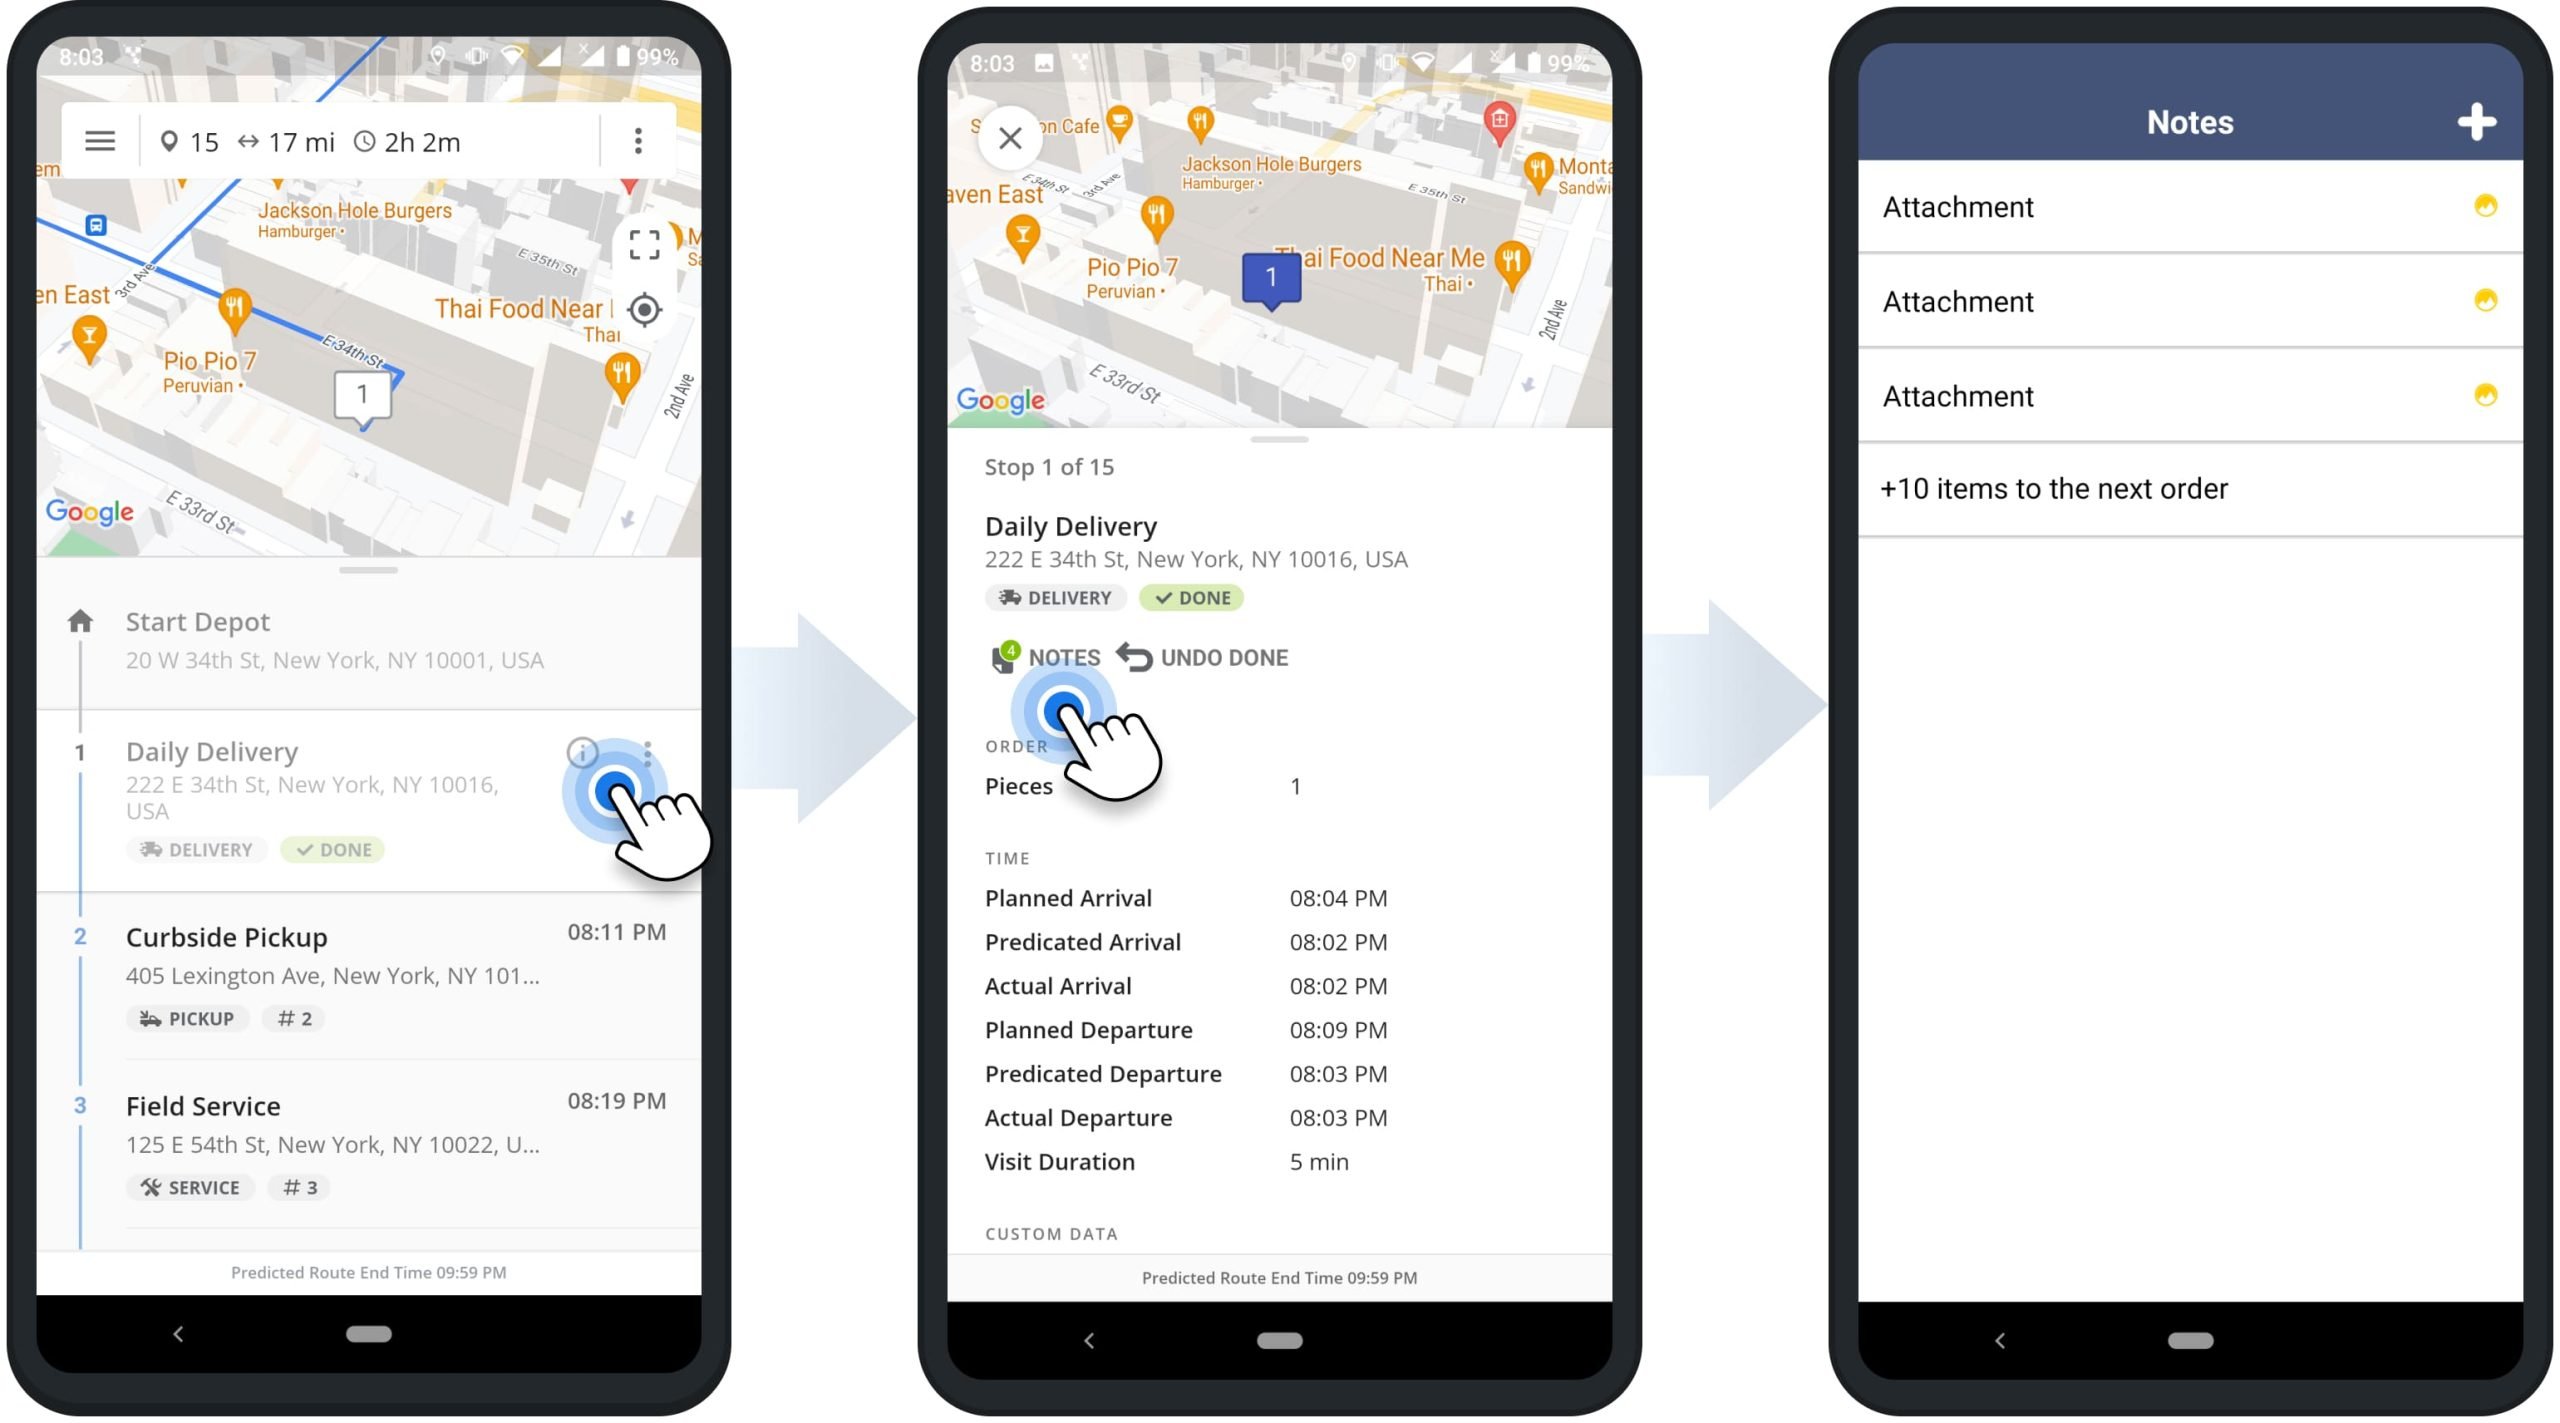
To check the attached proof of service, visit, or delivery of a stop, tap the information icon next to the preferred stop and then tap the “Notes” button. Accordingly, on the stop’s “Notes” screen, you can open and check the images, videos, customer e-signatures, and text notes attached to the given stop.
Mobile App to Web Platform Real-Time Statuses and POD Synchronization
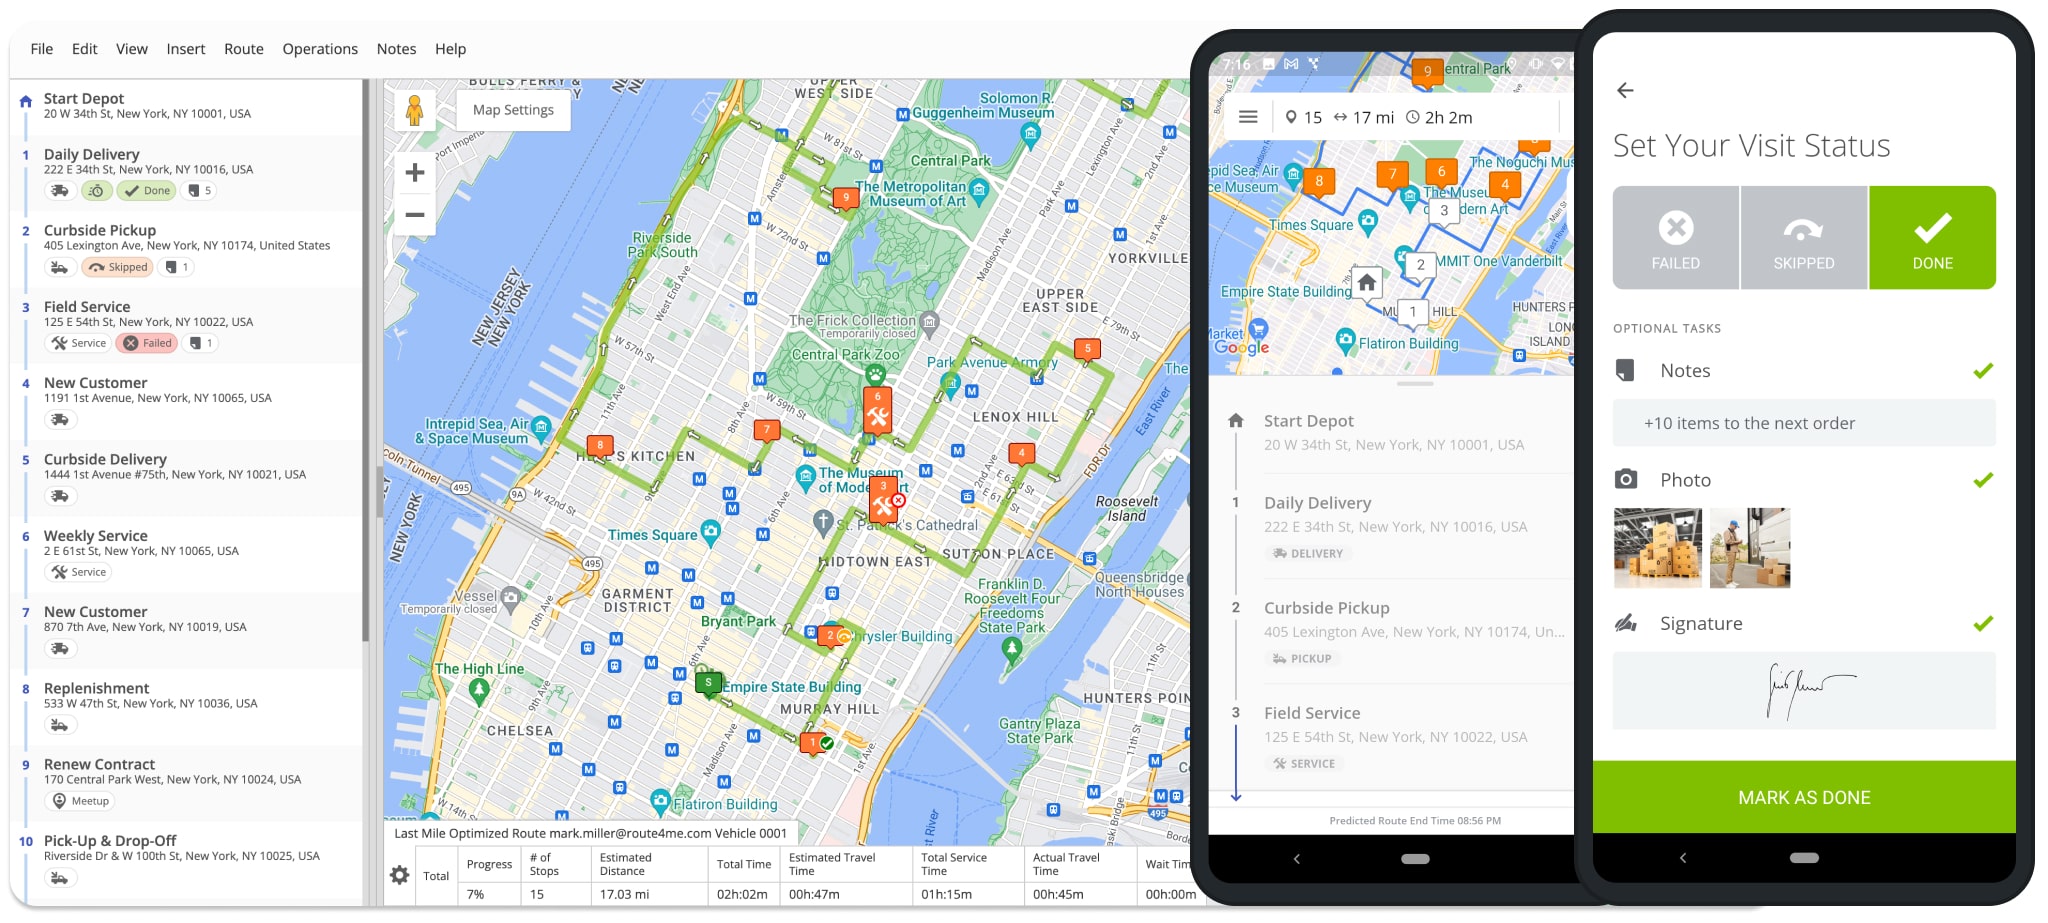
Moreover, Route4Me’s Marketplace Subscriptions support real-time route stop status and proof of visit synchronization between the Android Mobile Route Planner app and Route4Me’s Web Platform.
In detail, when assigned drivers set statuses to route stops from the mobile app, updated stop statuses instantly become available on the Web Platform, and vice versa. Similarly, when drivers attach e-signatures, photos, notes, and other data to stops, this data becomes available on Route4Me’s Web Platform in real-time. Additionally, learn more about Route4Me’s User Types and Dispatching Routes from the Web Platform to Mobile Route Planner apps.
Visit Route4Me's Marketplace to Check out Associated Modules:
- Operations
Custom Data Add-On
- Operations
Advanced Team Management Add-On